
For Halloween this year, my kid wants to be a Venus flytrap. So, I decided to be a house fly using materials at home to make the costume.
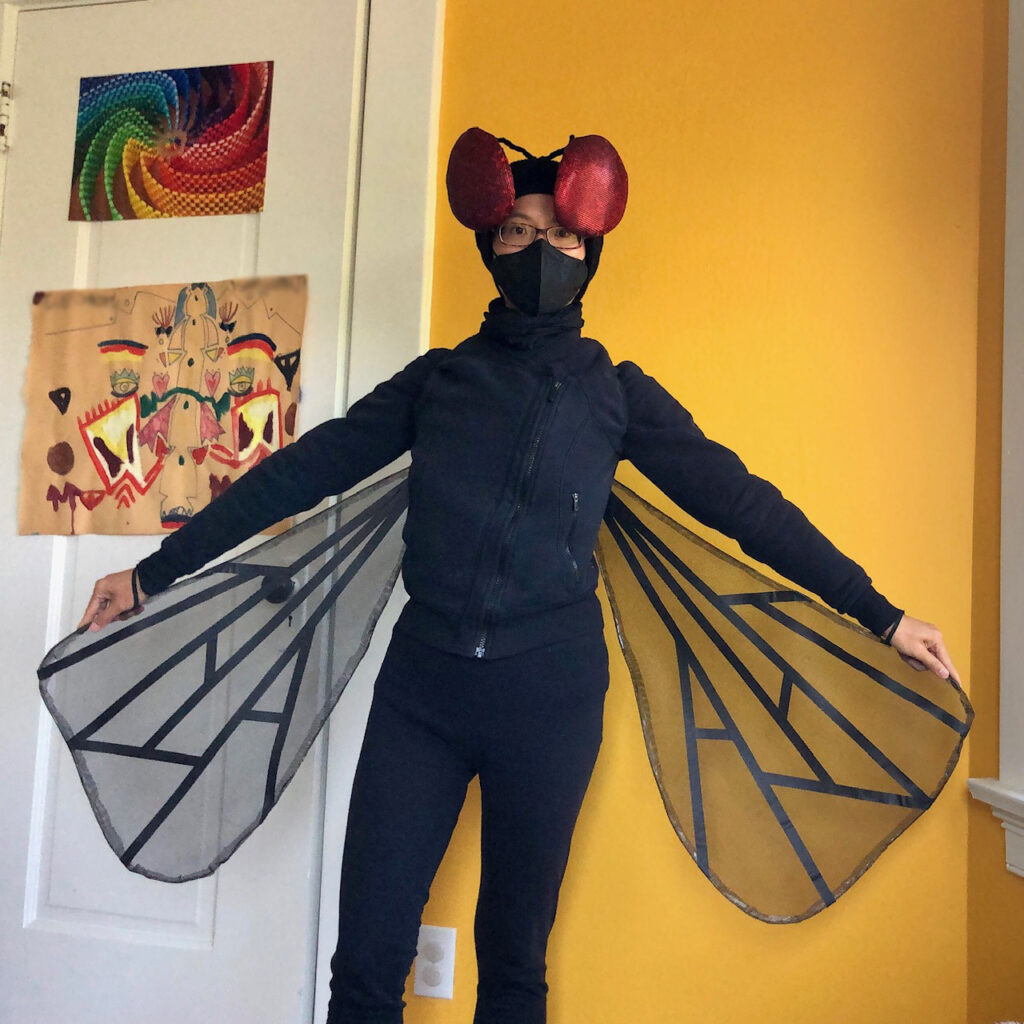
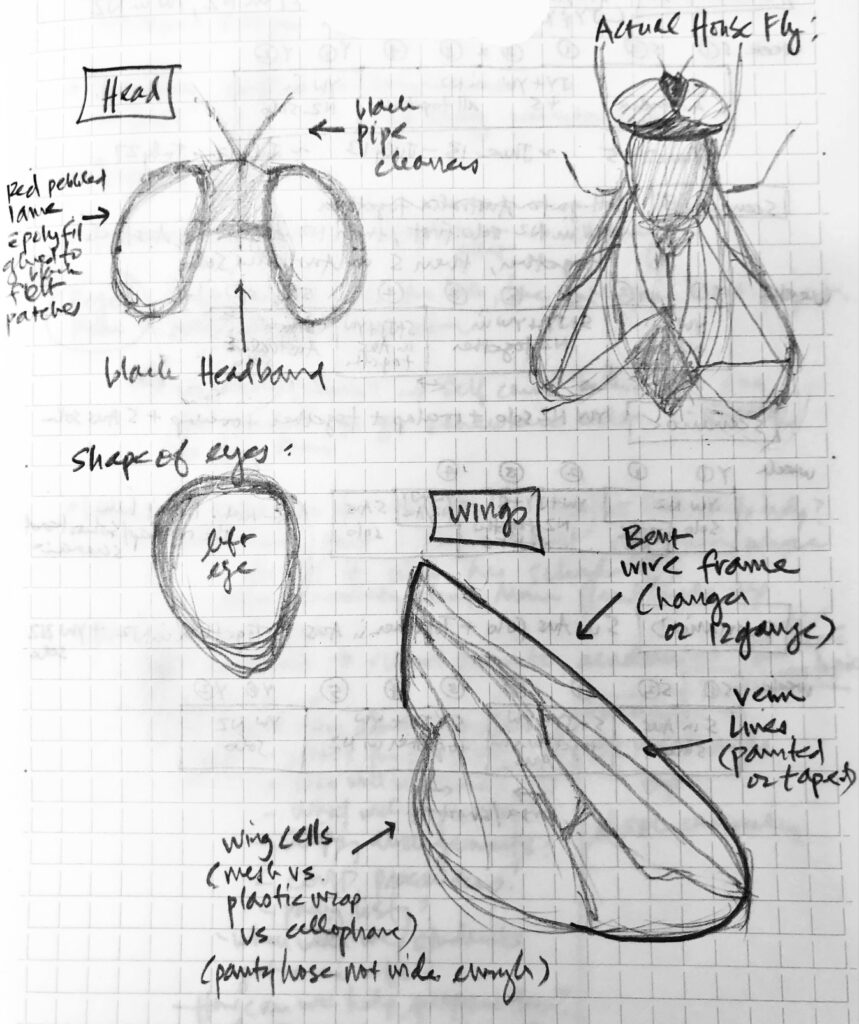
I wanted the wings and eyes to look something like the real thing, so I researched house fly anatomy and sketched out the shape and patterns of compound eyes and wings:
Materials
- Wings:
- Wire hangers from dry cleaners for wing frames. Alternate: 12–13-gauge steel wire.
- Mesh screen sheet material for wings. Alternates: thin sheer fabric, cellophane, panty hose if small wings.
- Black masking tape for wing veins. Alternates: electrical tape, floral tape, black permanent marker, black paint.
- Craft/fabric glue and clips for attaching the wing material to the wire frames.
- Duct tape to attach the ends of the wire together for the wing frames.
- String or elastic to make loops to wear the wings on your shoulders and attach to your arms.
- Fly head:
- Cardboard, cardstock or stiffened felt for the backs of the eyes.
- Polyester stuffing. You can use any type of soft stuffing you have around, pull some from old unused pillows, etc.
- Red fabric for the eyes. I didn’t have good red fabric at home, and I really wanted to recreate the compound eye look with its hundreds of lenses, so I bought some awesome closeout “iridescent hologram red” knit fabric online (here).
- Rubber bands to bind the eye fabric over the stuffing and backs.
- Safety pins, Velcro, or needle and thread to attach the eyes to the beanie or headband.
- Black pipe cleaners or wire for the antennae.
- Black beanie and/or headband to attach the eyes and antennae to.
How to make the house fly costume
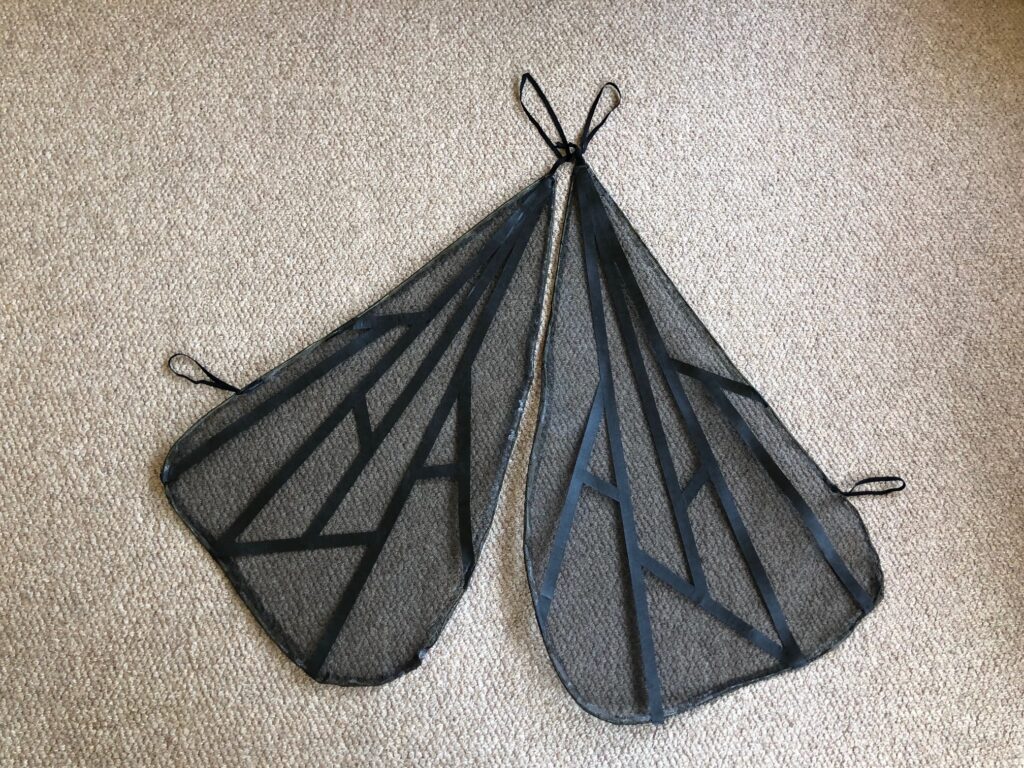
Wings:
- Unwind the wire clothes hangers and shape them into the fly wing shape. I used two clothes hangers for each wing and attached the ends using duct tape. This made wings 29” long and 13” wide.
- Cut the wing material into the shape of the wing frames with 1” overhang- enough to wrap the material around the wire frame and glue it.
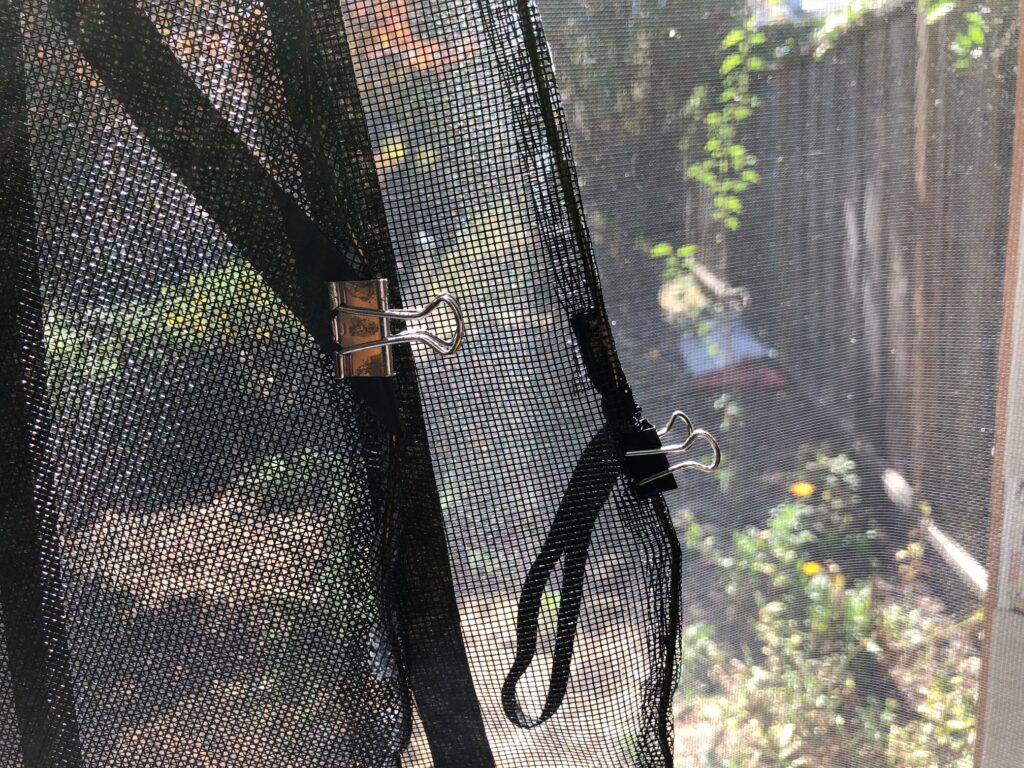
- Apply the craft/fabric glue around the edge of the material to glue it to the frame, using binder and/or paper clips to keep the edges down. The plastic mesh material I used popped off easily from the frame so I had to work in sections and use a lot of clips to keep it down till the glue dried, waiting about an hour between each section. Once the glue dried, it was securely attached. I also tried double-sided tape and hand-sewing the material on to the frame, but the glue plus clip combo worked best. Thinner fabrics and cellophane should be a lot easier to keep down with the glue. If you’re making smaller wings (e.g. one hanger per wing), you could potentially also stretch some panty hose over the frame.
- Use the black tape, marker or paint to draw the wing veins on the wing material. I used the same pattern (mirrored) on each wing.
- Use the string or elastic to tie loops along the top of the wings so you can wear them on your shoulders. Tie another set of loops if you want along the long edge of the wings to attach the wing edges to your wrists/arms.
Fly head:
- Cut the cardboard, cardstock or stiffened felt in the shape of the fly eyes.
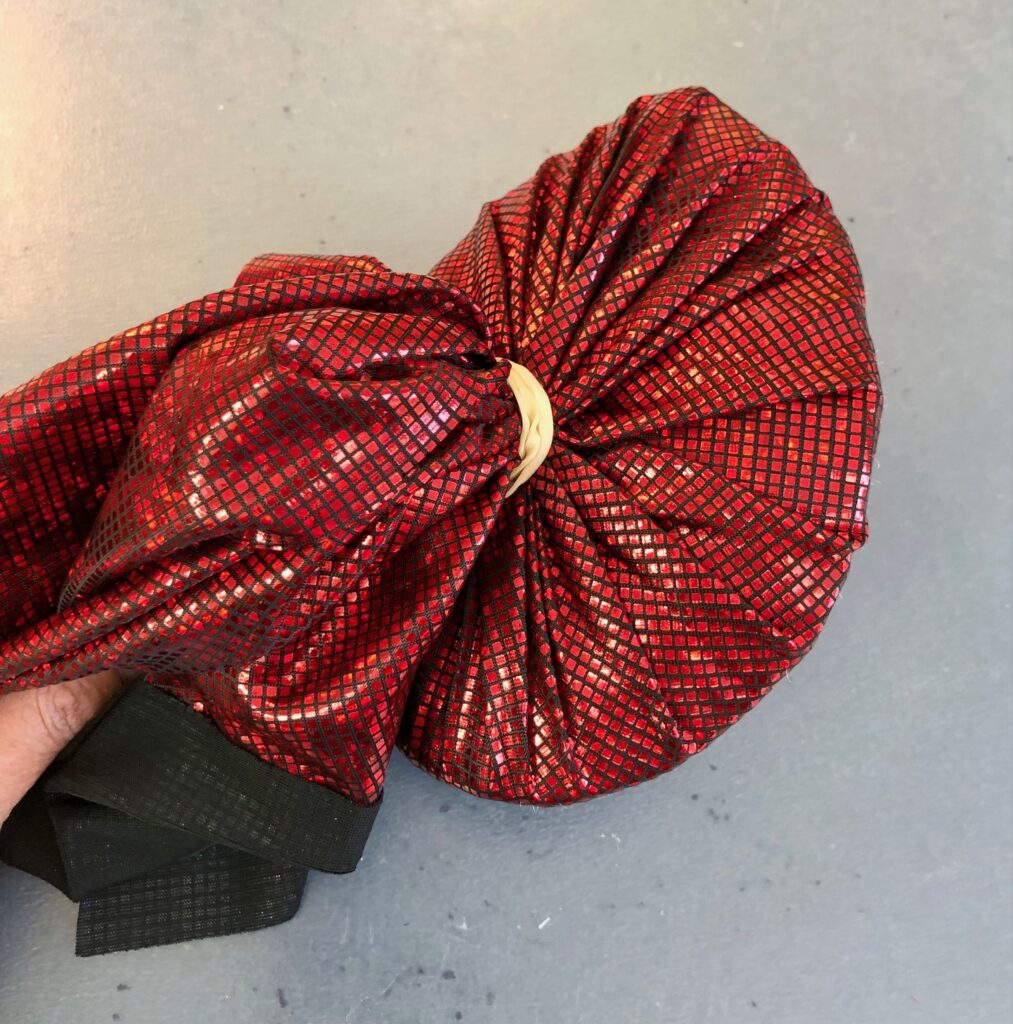
- Stick a handful of stuffing on top of the eye shapes.
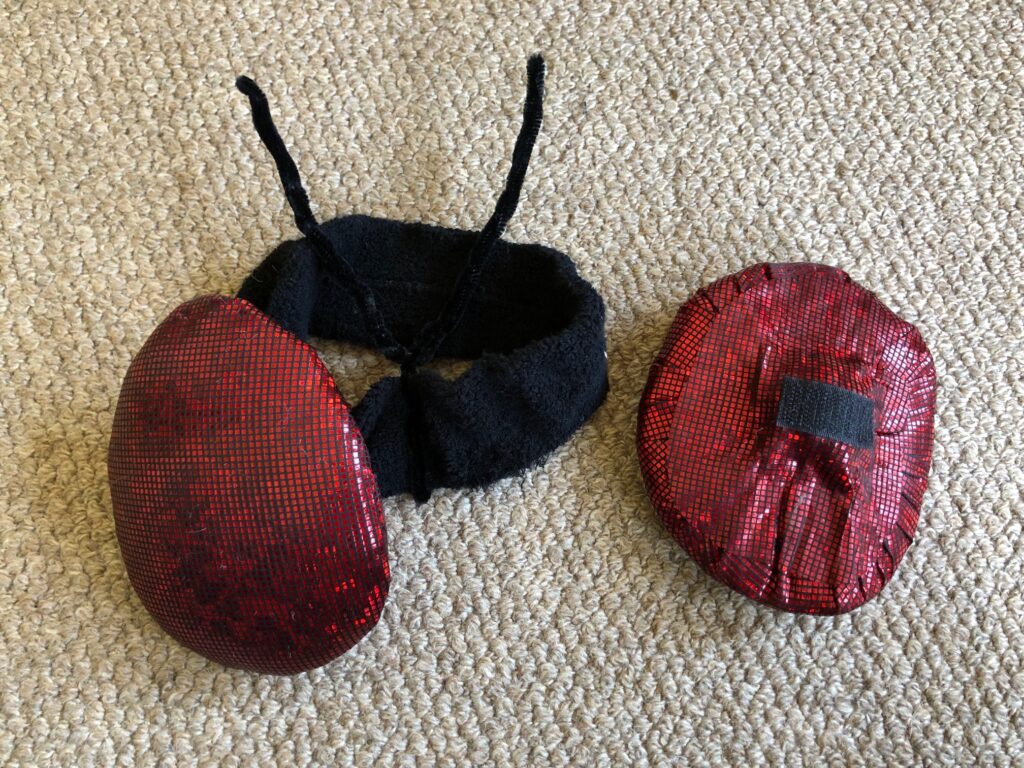
- Wrap the red fabric around one of the eye shapes and stuffing to start shaping the overall eye shape. Add/take away stuffing to get the look you want. Secure the fabric around the stuffing and eye backs with a rubber band. Cut the excess fabric off. If you want a flatter back, glue a patch of fabric onto the cut ends and press down with an object to flatten while it’s drying.
- Repeat Step 3 for the other eye.
- Attach the eyes to the beanie or headband with safety pins, Velcro, or needle and thread.
- Shape the pipe cleaners or wire into the antennae shape you want to wind around the headband or stick into beanie. I attached the eyes and antennae to a headband and wore that over the beanie.
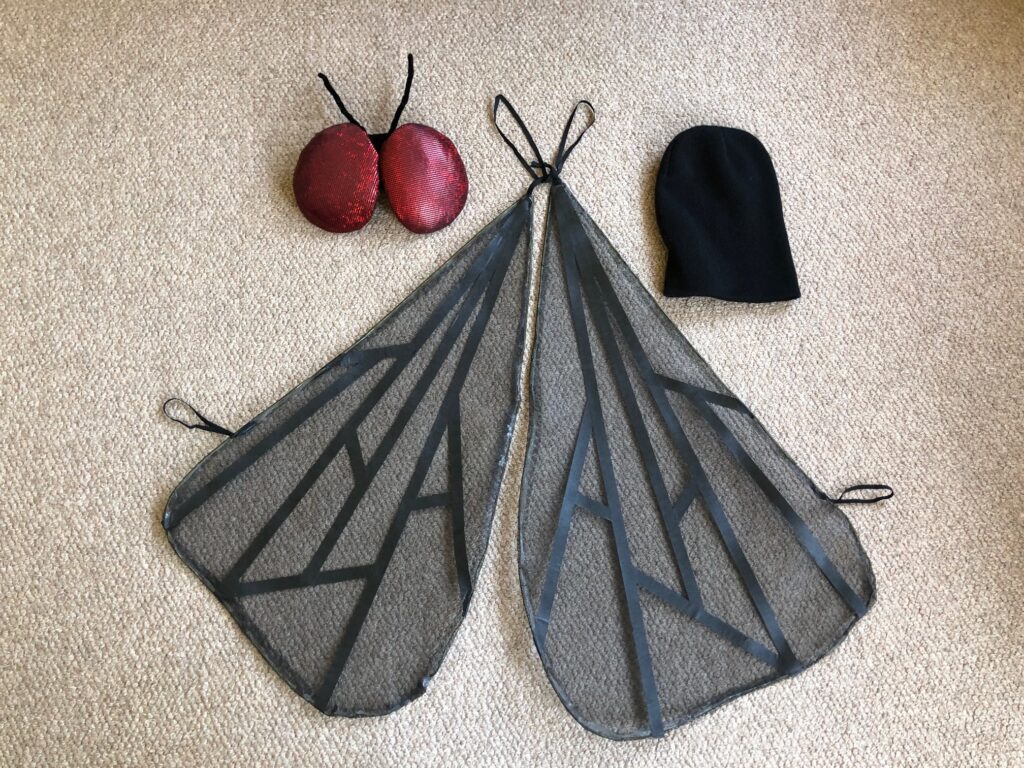
Voilà! Put the wings and beanie/headband with black top and bottoms, and you are Supa Dupa Fly!

OMG, thank you for sharing this! I’m being a fly for Halloween this year and now I’m set to DIY an awesome costume.
Hi Loryn, Awesome! So happy to hear that this is helpful for your DIY fly costume! Have a great time making it and wearing it! 🙂
Thanks again, the guide was so helpful! I pinned all the parts to an old sweatshirt. Can’t wait to wear it on Friday. Happy Halloween!
Awesome! Thanks for sharing the photo of your fly costume, Loryn! I love how you attached the wings to a hoodie and used spiderweb fabric for the wings! Have a super fun Halloween wearing it!
I love it! Im gonna dress my dog up as a fly and I needed ideas for the eyes! Thanks
Hi Esteban, I love that you’re dressing your dog up as a fly!! So happy to help you figure out the fly eyes. Please share a photo of your dog-as-fly if you get a chance!