
Avocados are delicious, healthy… and produce a red dye! Yes, you can use this amazing green fruit to dye natural fibers into a range of reds, from pink to purple.
In this post, I will show you how I used avocado pits and skins leftover from our home kitchen to dye cotton, linen and silk textiles. You can use this process to dye any cellulose or protein fiber: cotton, linen, rayon, silk, wool.
Jump to:
- The science and history behind avocado dye
- Saving pits and skins
- Preparing fabrics: mordanting or not
- Avocado dye bath recipe
The science and history behind avocado dye
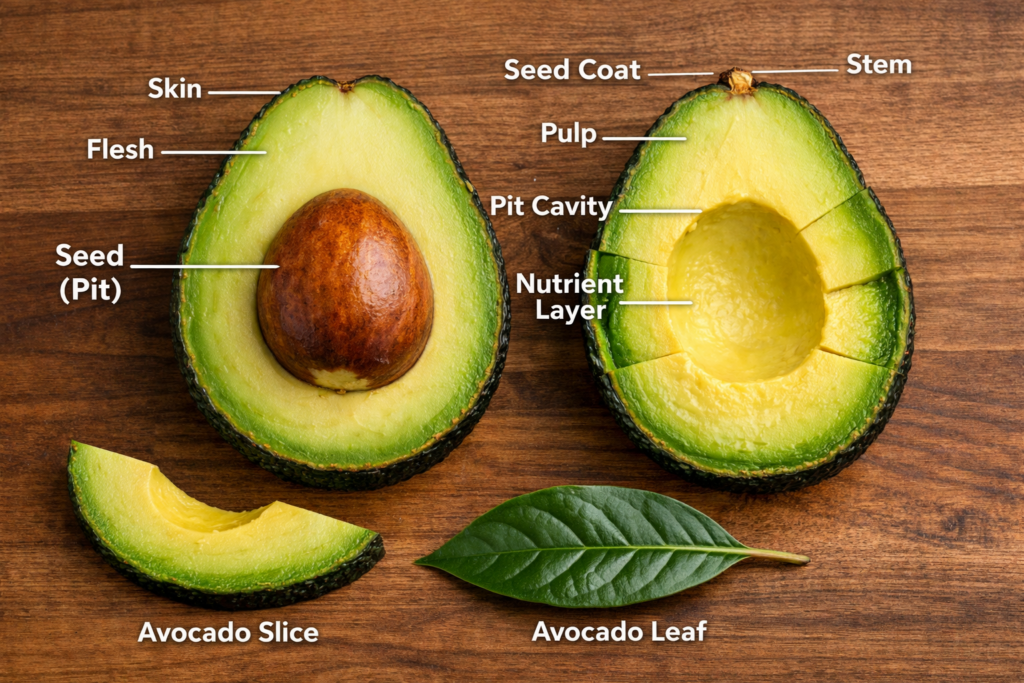
Avocado skins and pits appear green and brown when the fruit is fresh. They also contain high concentrations of tannins, color-rich polyphenol compounds that bind to proteins and serve as plant defense against herbivores and pathogens, such as fungi and bacteria. Tannins taste astringent to animals and serve as a deterrent for eating unripe fruit until the seeds are mature.

The avocado plant evolved millions of years ago to attract the giant ground sloth of the Pleistocene epoch. The giant sloth swallowed the fruit, digested the fatty fruit, and pooped out the giant seed, dispersing the plant far and wide. After a mass extinction event killed the giant sloths, avocado trees were dying out until ancient Mesoamericans started collecting and eating the fruit, and later planting and cultivating the seeds.
The English word “avocado” is derived from the Spanish word aguacate, which comes from the Nahuatl/Aztec word āhuacatl. The word “tannin” is derived from its common use for tanning leather and mummy wrappings as far back as 5000 B.C. Egypt. Tannins produce many of the colors in flowers, fruit and deciduous tree leaves as they turn yellow to red to brown in the autumn.
Depending on the other compounds used in the dyeing process, a wide range of colors can be produced from tannins. Avocado tannins are pH sensitive; acidic baths produce more yellowy-peachy-salmon shades while alkaline baths produce redder shades. Higher temperatures shift the color from pinks to orange-browns. Adding varying concentrations of iron can yield a greyish lavender with a tiny concentration to blacks with a higher concentration of iron.
Saving pits and skins
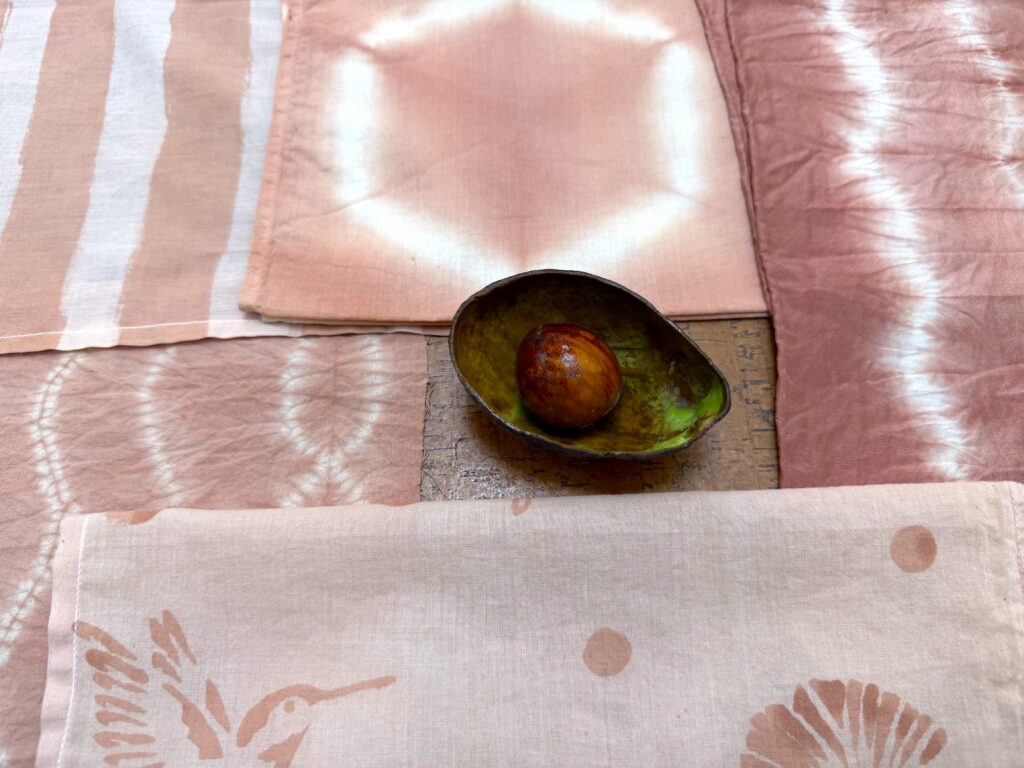
Our family eats avocados often when they are in season. The Hass cultivar of avocados tolerates cooler temperatures and grows well here in California. Last year I started saving the pits and skins for this dye project by scraping leftover fruit from their surfaces and putting them in a zip-top bag in the freezer. When the skins started taking up too much space, I just saved the pits.
While I accumulated a gallon-sized bag of pits and skins, I only needed 10 pits and a few skins to make a very concentrated dye bath to fill a 5-quart pot and dye.
Preparing fabrics: mordanting or not
Tannins will attach directly to clean/scoured cellulose and protein fibers. Adding a mordant to the fiber first will increase the strength of the bonds, which makes the color deeper and more durable with repeated washings and exposure to sunlight (color/wash/light-fastness).
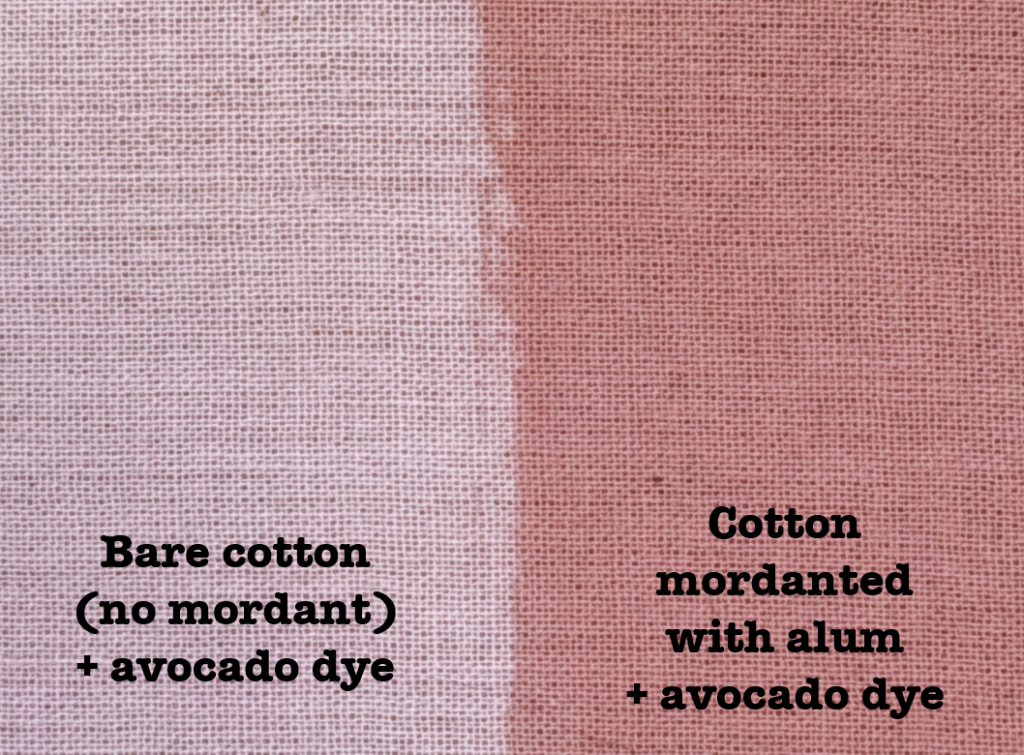
Above left: the light pink color I got from my avocado dye bath on unmordanted cotton (just cotton + avocado dye).
Above right: the darker salmon-red color I got applying mordant first to the cotton before putting it in the avocado dye bath (cotton + alum mordant + avocado dye).
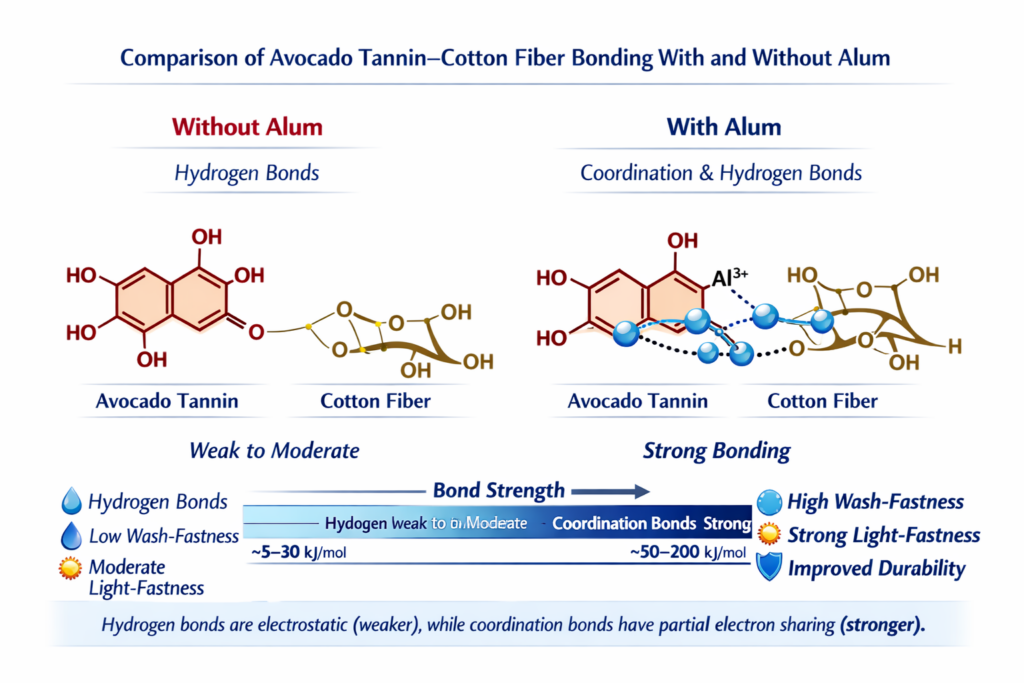
Cotton +/- alum mordant
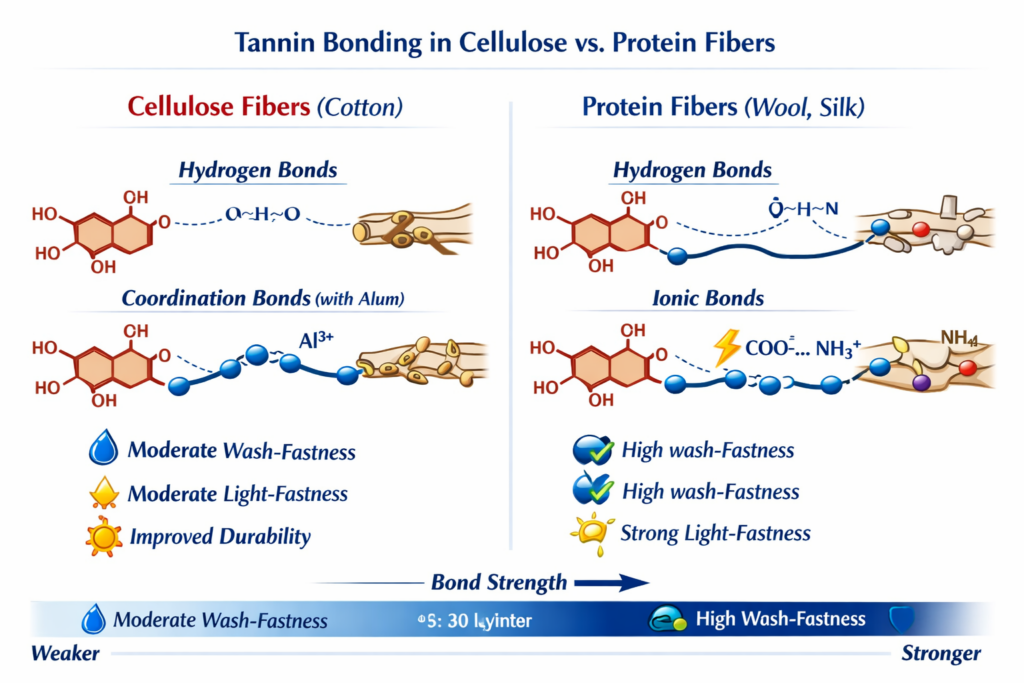
The following diagram shows how an avocado tannin molecule attaches to a cotton fiber with weaker electrostatic hydrogen bonds, whereas adding an alum mordant creates stronger covalent coordination bonds with partial electron sharing.
Protein fiber (silk or wool) vs. cellulose fiber (cotton) +/- alum mordant
The following diagram shows how protein fibers also form ionic bonds with tannins, transferring an electron. Because of this, they attach better to tannins alone and tend to have deeper durable colors. Alum mordant makes the bonding stronger with covalent coordination bonds.
If you want to keep everything plant based, you can also use soy milk to strengthen the bonds between the avocado dye and cellulose fibers (cotton, linen, hemp, rayon). Soy milk adds ionic bonds to the cotton as well as physical adhesion from its protein. The color and durability will not be as strong as the metal-based mordants like alum, but still decent and better for the planet.
Instructions on how to pre-treat fabric with mordant or soy milk can be found on:
- Botanical Colors guide to mordants and specifically on using alum to mordant (what I used).
- UK artist Rebecca Desnos’ guide to pre-treating fabric using soy milk.
Avocado dye bath recipe
Let’s make the avocado dye bath! Set aside 1-2 hours to prepare the bath, 1-2 hours to cool and filter, and 1-2 hours to “cook” the cloth in the dye bath, plus optional overnight immersion if you want to deepen the colors.
[Coming soon! Photos to show the entire dye bath process.]
Ingredients/supplies
- Clean/scoured cellulose and protein fibers you want to dye +/= mordant
- Cleaned avocado pits and skins at 100% weight-of-fiber (WOF), which means if you want to dye 300 grams of cotton fabrics a moderate pink (unmordanted) or salmon-red (mordanted), then use 300 grams of avocado pits and skins. You can use less if you want lighter colors or more for darker colors.
- A hammer, mallet or knife to break up the pits and skins into bits and chunks
- A plastic bag to put the pits and skins in if using a hammer or mallet
- A stainless steel pot that will hold enough water to completely cover the pits and skins
- Heat source to heat the dye bath
- Spoon
- Fine sieve or stranger with cheese cloth to filter out pit/skin debris
- Bowl or additional pot for filtered dye bath
Steps
- Break up the pits/skins: Place the pits and skins in the plastic bag and use a hammer or mallet to break them up into smaller chunks and bits. Alternatively, use a knife to cut up the pits and skins, but be very careful to not cut yourself since the pits are hard and slippery especially when fresh. Breaking up the pits and skins exposes and releases more of the tannins inside.
- Place the pits and skins into the pot and cover with water.
- Heat slowly to about 180-190’F and simmer for about an hour. Higher temperatures will shift the color from pink to orange/brown. You can add ½ to 1 tsp calx or soda ash while it’s simmering to shift the color to a deeper red. The dye bath smells lovely!
- Meanwhile, wet out your fabrics by soaking them in water.
- Cooling/straining: After 60-90 minutes of simmering, turn off the heat and let it cool. Once the bath is cool enough for you to handle, strain the plant debris from the bath using the fine sieve or a strainer with a cheese cloth or muslin cloth to filter out the finer bits.
- Wipe out your pot so it is clear of plant debris, then pour the strained dye bath back in.
- Squeeze out your fabrics and add them to the dye bath. If needed, add enough water so the fabrics can move freely in the pot. And stir them in so they are fully immersed in the dye bath.
- Heat the dye bath and fabrics slowly to about 180-190’F and simmer for about an hour, stirring and checking often to help the fabrics dye more evenly.
- After 60-90 minutes of simmering, let the pot cool and check on the fabrics. If you like how they look, you can take them out, give them a rinse and hang to dry in the shade to let the color set before a final wash with detergent. If you want the colors to deepen and become more durable, you can let them sit in the bath overnight before rinsing and drying.