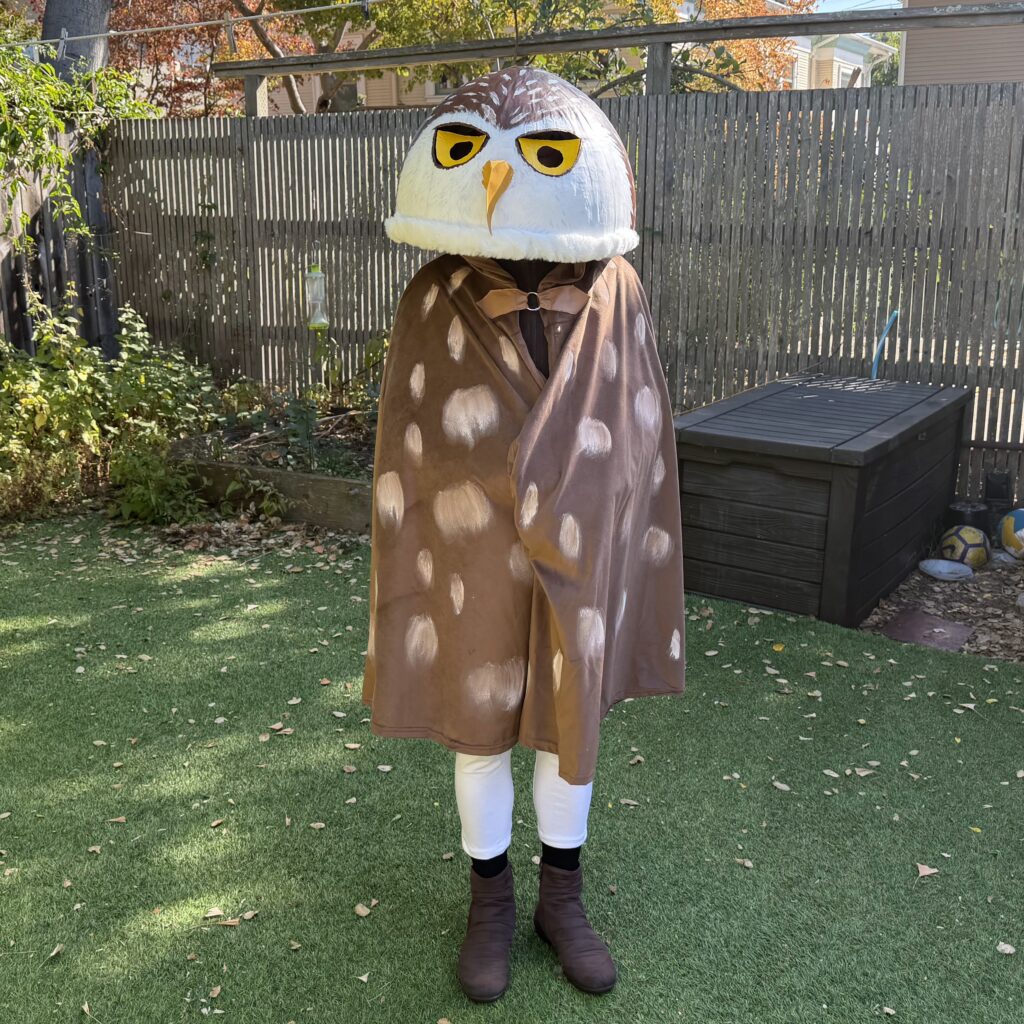
This year our family decided to be owls for Halloween. This post includes how I made a realistic paper mache owl mask and matching cape, step by step. Click on the following links to jump to:
Background and inspiration
We were inspired by the owls we’ve encountered in the recent years: a perky Burrowing Owl standing tall and staring at us in broad daylight along the Bay Area shoreline, beautifully intimidating Great-horned Owls that hunt for rodents in our city neighborhood and at our family’s Central Valley California farm, a teeny sleepy Northern Saw-whet owl in the forests of Tilden Park in Berkeley, a Barn Owl swooping over the twilight hills at Mount Diablo, a Barred Owl hiding in the trees on a drizzly day in a Vancouver City park.
I decided to make a Burrowing Owl, Athene cunicularia, an adorably perky, small, long-legged owl that lives here in California and much of the Southwest US, Florida, Central and South America. Cowboys called them “howdy birds” because they look at people and bob their heads up and down, as if they are greeting us. In reality, they are more likely sussing us out as possible threats. Chicks learn to make rattlesnake sounds to scare away predators. Burrowing owls commonly occupy burrows excavated by ground squirrels, prairie dogs, tortoises and other animals, where they stockpile food (especially rodents) for egg and chick-rearing. They will also collect animal poo to put around their nests to attract one of their favorite food: dung beetles.
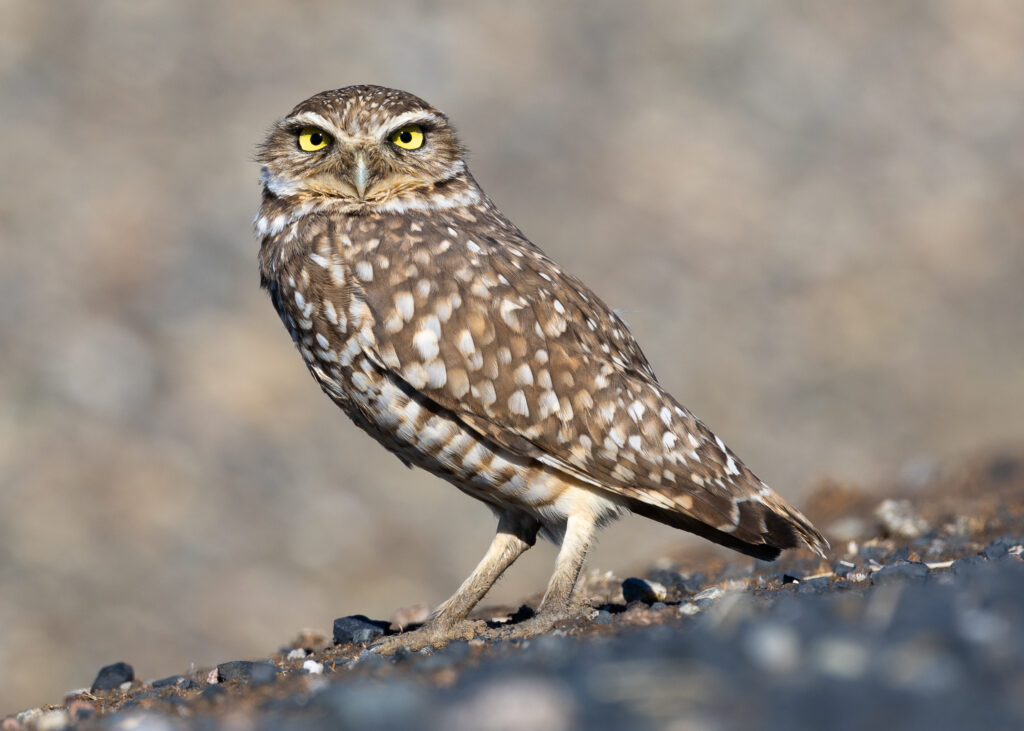

Due to habitat loss, pesticides, and poisoning of prairie dogs and ground squirrels, burrowing owls are endangered in Canada, protected in Mexico and are under consideration for endangered status here in California. Birders, scientists and community conservationists have built artificial burrows out of buckets (for openings) and long pipes (for tunnels) buried into the grassland soil. There are some creative and hopeful examples of artificial burrow projects in San Diego and Chico, California, and Umatilla, Oregon. Several of our family’s favorite East Bay parks (MLK Shoreline, Cesar Chavez Park, Coyote Hills) have protected areas for burrowing owls, where we have seen them. With this year’s family owl costume, I wanted to celebrate these spunky little birds.
Costume design
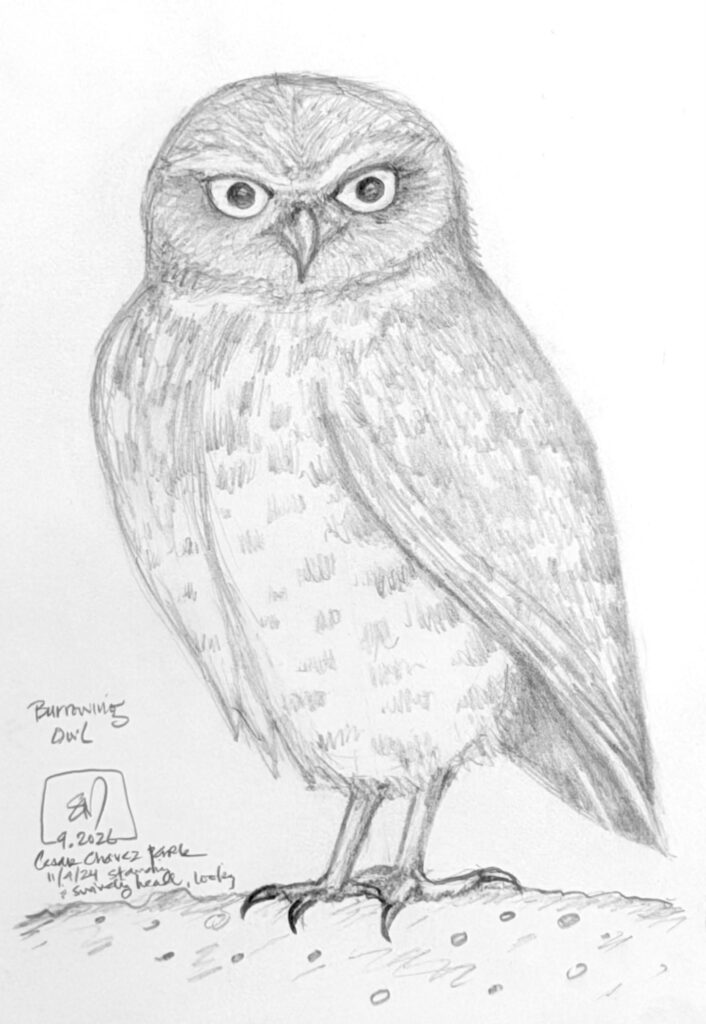
First I studied and sketched a burrowing owl. I wanted to have a good understanding of the owl’s anatomy and proportions.
I then researched what people use to make owl costumes. I found kiddie cartoon-ish DIY owl costumes or professionally-made realistic owl masks that look amazing but cost $800+ (!!). I wanted to create something in between: more realistic and still DIY make-able with common supplies found at home or easily and affordably bought.
Even the kiddie cartoon DIY owl costumes would cost $100-150 for the felt alone. That’s a no-go for me. I did not want to buy that much plastic, which is what craft felt is made from. I did not want to buy actual feathers, which come from the slaughtering of birds. The hypocrisy of killing birds to make a costume to honor and conserve birds is too much for me, even if it looks cool and realistic. Plus, I wanted to spend less than $20 for the entire costume.
Design challenge!
I found a great DIY Owl Piñata Instructable which helped me narrow down the materials to paper, glue and paint. I decided to make a paper mache head with glue instead of flour to make it stronger. I would then cut and add shapes and paint the head. For the body, I decided to use a brown cape and paint white feathers on it. Initially I was going to make the cape from brown velvet or fuzzy fabric, but I found a ready-made cape for $11 that was far cheaper than purchasing the raw material and making it myself. That saves $40 and 6+ hours of my time! I purchased the ready-made $11 brown cape.
I wanted my costume to match the proportions of the actual Burrowing Owl as much as realistically possible. It turns out owls have gigantic heads relative to their bodies. If I made the proportions exactly the same to my body, my owl head would be 15 inches high and 25 inches in diameter, and too humongous to wear! I’d look like an owl-version caricature of Dark Helmet from Spaceballs, who is already a caricature of Darth Vader from Star Wars. So I dialed it back, kept the height-width proportions of the burrowing owl head and made the height match my head+neck height (10 inches) and made the diameter match the width of my shoulders (16 inches). With those measurements decided, I started to gather materials to make the owl costume.
Step-by-step instructions
Gathering materials
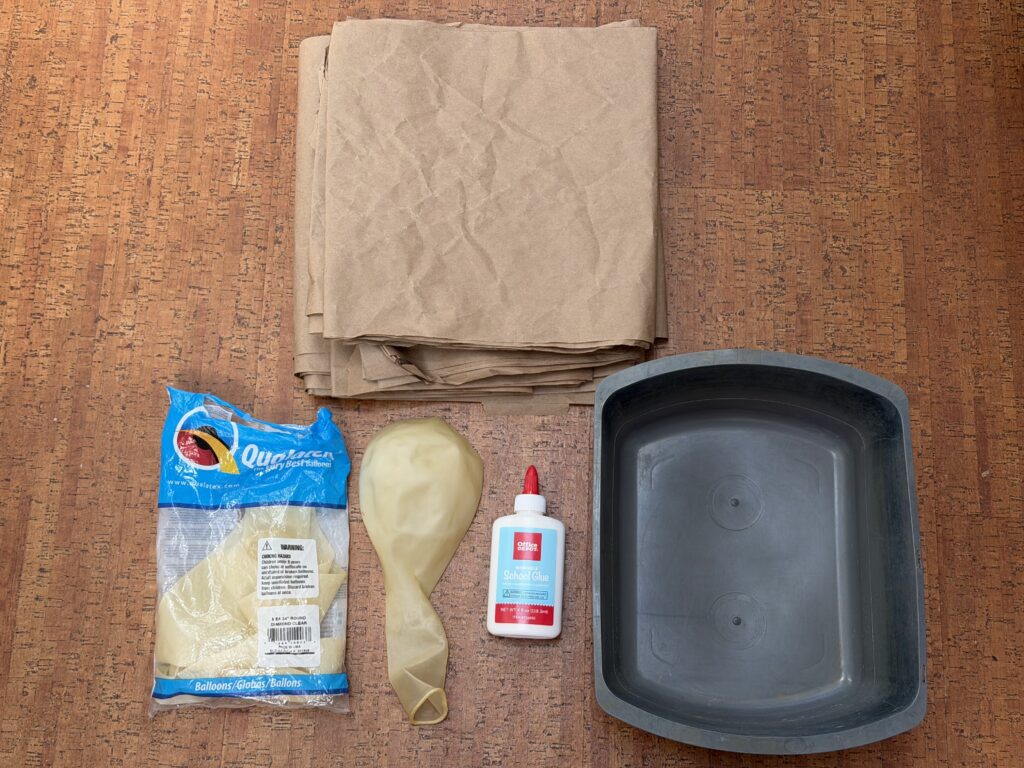
For the paper mache head:
- A balloon that can be blown up to the diameter you want. We had a 24” balloon that I blew up to 16” in diameter.
- A permanent marker (e.g. Sharpie) for marking the balloon.
- Paper: I used scrap kraft paper salvaged from packages. Alternatives: old newspapers, any scrap paper.
- Scissors or paper cutter to cut the paper strips.
- PVA glue for a stronger paper mache. I used a school craft PVA glue for the initial layers and a pH-neutral craft PVA glue for the final layers. I’ve also heard of people using wood glue for an even stronger paper mache with fewer layers, but I didn’t have any on hand and also didn’t want the extra chemicals in wood glues. All-purpose wheat flour or rice flour can also be mixed with water if you’re ok with a potentially more breakable mask or can add lots of layers for strength.
- Water to thin the glue or mix with flour.
- A bin to make the adhesive slurry and dip the paper strips.
- A large bowl or bucket to stabilize your balloon while laying on the strips.
- Acrylic paints in your owl’s head colors. I used brown, yellow and white paints.
- Paint brush(es) in the size you like to paint with. I used a wide 2” flat brush for most painting and a #10 pointed round brush for details.
- A sheet or strip of soft packing foam to cut a head band.
For the cape body:
- A ready-made cape or fabric (~4.5 yards) to sew a cape with.
- Acrylic paints in your owl’s body feather colors. I used brown and white paints.
- Paint brush(es) in the size you like to paint with. I used a wide 2” flat brush for most painting and a #10 pointed round brush for feather details.
Making the paper mache head
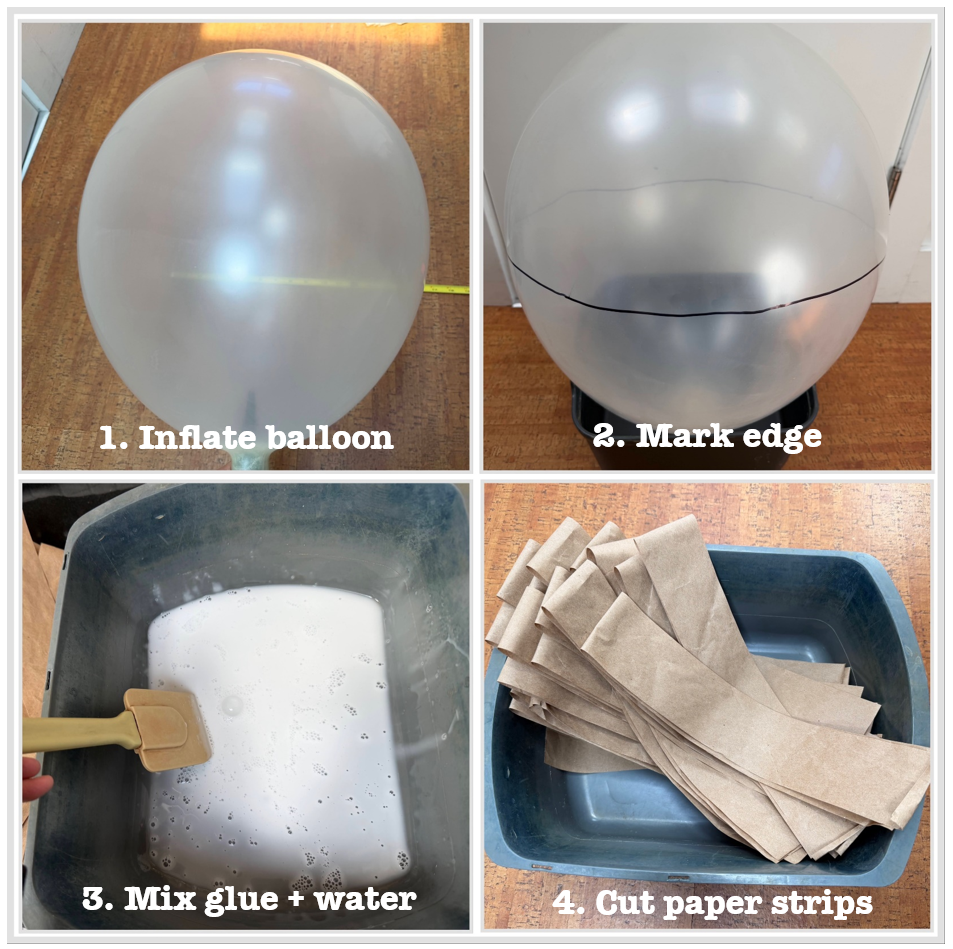
1. Inflate the balloon to the diameter you want the head size to be. I inflated my balloon to 16 inches in diameter. Tie the end tightly and place the balloon in the bowl or bucket with the tied end down to stabilize it. Put a protective floor/surface cover underneath to catch drips and paint. I used pieces of scrap packing paper as my floor cover.
2. Mark the balloon where you want the opening edge of the mask to be with the permanent marker. I wanted my head to be 10 inches high, so I marked several spots 10 inches from the top, then drew a circle around the diameter of the balloon connecting those spots.
3. Prepare the adhesive slurry in the bin using 1 part glue or flour to 1-1.5 parts water. You can make it as thick or thin as you like. Thick adhesive is sticky and harder to work with but dries faster and stronger. Thin adhesive is easier to handle but is wetter and dries slower.
4. Cut the paper into 1.5-2 inch strips with scissors or a paper cutter.
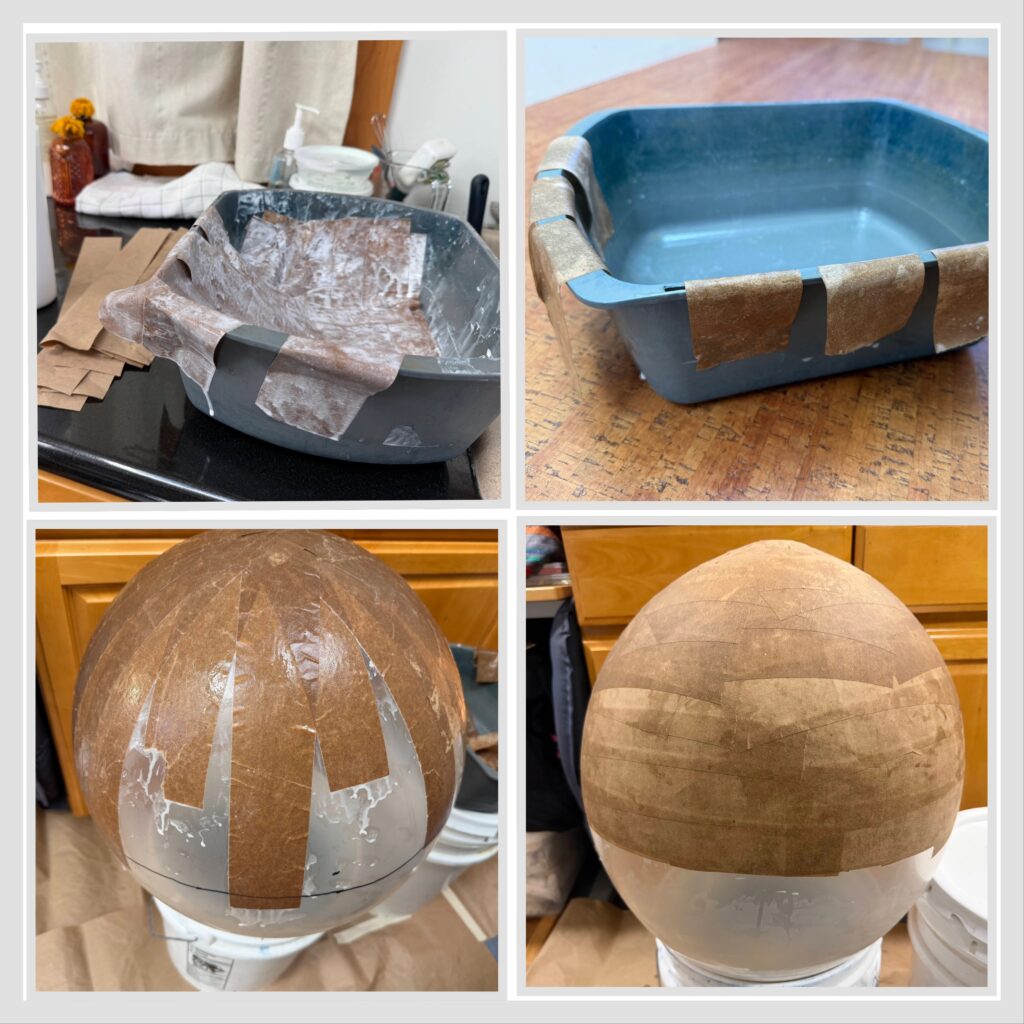
5. Coat each strip in the adhesive slurry. I coated 4-5 strips at a time and draped each strip across the edge of the bin so it was easier for me to lift off and place on the balloon.
6. Place the coated strips on the balloon, overlapping each strip by ¼ or ⅓ of its width, until the entire marked area is covered. I started my base layer with overlapping vertical strips. Since almost all the strips overlap over the top, it became very thick, so once the top got thick, I cut/ripped the remaining strips so they wouldn’t reach the thick top part.
7. Allow each layer to dry. It took about 4-6 hours for each of my layers to dry, so I often did one layer in the morning and/or one layer at night, and then let it dry overnight.
8. Repeat ~6 times and cross strips with each new layer: if you started with a layer of vertical strips, place horizontal or diagonal strips for the 2nd layer, then vertical strips for the 3rd layer, etc. If you are short on time, you might be able to make a mask strong enough with 4 layers using glue 1:1 with water as the adhesive or even fewer layers using undiluted wood glue. I made my mask with 6 layers, and it is decently hardy and strong, which I want for my multiple days of use.
9. When all the layers are dry, deflate the balloon. Gently separate the open edge of the paper mache off the balloon with your fingers, then deflate the balloon by either untying the knot (which is what I did with some effort) or by piercing a small hole to allow it to release air slowly. Coming soon: a video at 20x speed of what that looks like.
10. Cut out the eyes and add a beak and maybe ears to the head for the type of owl you want to make. The burrowing owl has a simple round dome-shaped head without ears that stick out, so I just:
- Added a beak using scrap cardstock that I cut out and glued together onto the head, and
- Cut out the eyes and re-attached them backwards with tape on the inside. This is a cool trick I learned from this DIY Owl Piñata Instructable which gives the eyes some dimension and makes them look like they are inside skull eye sockets.
11. Paint the head with the colors that match the owl you want to make. I used brown, yellow and white acrylic paint for the burrowing owl head.
12. Add a head band on the inside of your owl mask by cutting a ~1-inch wide strip of soft packing foam that is long enough to go around the top circumference of your head.
- Put the owl mask on your head, positioned for how you want to wear it (e.g. so you can see out of the eye holes).
- Use a pencil or pen to mark the edge of where your head meets the inside of the mask.
- Tape the foam just to the outside of the head marking you just made.
- Test the position of the mask on your head and adjust the head band as needed.
- Once you are happy with the head band position, you can add more tape or glue it down so it stays in place. I used masking tape without glue, and it has stayed in place so far.
13. Add any other embellishments to make it your own! I added a bit of fuzzy white trim on the bottom of the mask as a cozy organic collar/neck area.
Making the cape body
- Spread out your ready-made cape or sewn cape over a protective floor/surface cover to catch paint drips. I used pieces of scrap packing paper as my table cover.
- Prepare and mix your chosen paint colors as needed. I squeezed out a small pile of brown paint and a separate larger pile of white paint.
- Paint the feathers on your cape. I dipped my 2” flat brush in a larger amount of white paint, followed by a small dip in brown paint, then checked how it looked together on scrap paper (I wanted to get brown streaks in the white so it looked more organic), then brushed from top down to create the feather shapes.
- This YouTube video includes a detailed tutorial on painting feathers on canvas using a filbert brush. Skip to ~1 hour 15 minutes into the video to see white feathers painted on a dark background.
- I don’t have filbert brush and instead used a cheap 2” flat brush and the #10 round brush to add a few more thin lines, which seemed to work fine. You can’t get that much detail painting on fabric anyway.
After the paint dries, put on the cape and your paper mache owl mask, and now you are an owl-human! What a hoot!